
A while ago I read of someone who takes 'macro photos' - very close up photos - of things in nature, to use as part of her fantasy book cover designs. So rocks become mountains etc. I wish now that I'd kept the link so that I could let you see. That got me thinking and I took my daughter out for a walk armed with my camera. The reason I took my daughter was twofold - firstly, she has a far steadier hand than me and secondly, she doesn't mind getting down on the ground to take a photo. (I don't mind getting down either, I just have great difficulty getting back up.) We came back with a supply of good and not-so-good photos. I've let the 'simmer' on my computer for a while and a few have given me ideas for landscapes. Today, I'm going to show you how I work, from start to finish.

1.The orginal photo. Probably a mouse hole, or maybe the den of a bearded dragon. I lengthened the photo to give better perspective and cut out the 'sky'.

2. Initial smudging stage. Still very rough, but gives an idea of where I'm going.

3.That dip begged for a waterfall and if there's a waterfall, there has to be a river. I've no idea where the river goes after it heads under the hill, but this is fantasy! Maybe there's a huge, subterranean lake?

4. I began to sculpt the rocks. I did that by dragging the dark shade from the cave and by adding lighter colours and smudging them in.


6. Added sky and did some more rock sculpting.

7. I liked the shape of the landscape, but not the colour. So I made a multicoloured filter layer and put it on as a soft light. Far more fantasy worldish. The new road was leading to nowhere in particular, so I drew a castle to sit on the hill.
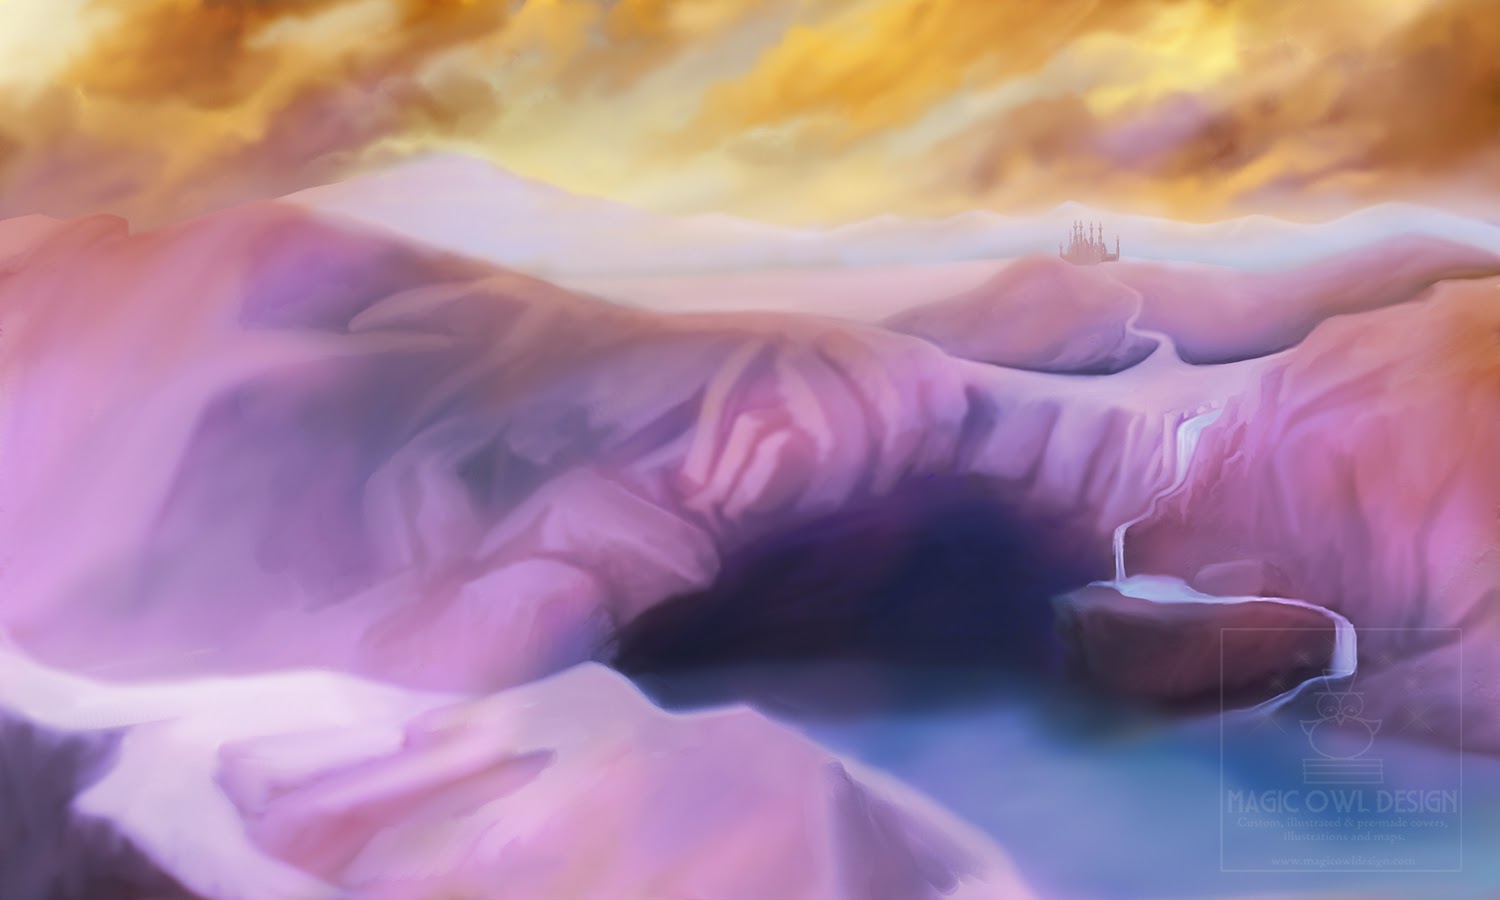
8. The pale rocks on the left had no real purpose, so I decided to make them into a pathway.

9. If there's a pathway, someone has to be seen to use it. I drew the figure as a separate painting so that I could put in as much detail as I like and then resize it. (It also means I have a figure I can adapt for other pictures!)

10. Final product. Well, until I decide to change it again. I can already see lots of possibilities. But I'll keep this one intact as it is.
Please feel free to ask any questions you may have. It was all done on a Cintiq 13HD, by the way... a little something I bought a couple of months ago and which I don't know how I ever worked without.
2 comments:
Very interesting, thank you! I do love your Dragon Box cover - fabulous colours.
Thanks, Lexi! It is a bit bright, isn't it? :)
Post a Comment